.jpg)
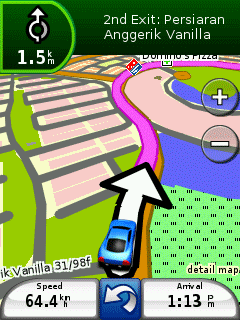
GPS and Mountain Biking
Recommended Models : 60CSx, Colorado 300, Oregon 300

Manually entering waypoints Of course, you'll have to read the manual that came with your unit. If you own a Garmin unit, Dale DePreist has an excellent on-line manual that betters Garmin's own. Once you've done so, you can check out one of the pages on this site that lists the trail route using latitude and longitude coordinates, such as the Sungai Dua trail.
The route table will look like this:
Route: Sungai Dua38.8km out-and-back through steep and sometimes technical 4wd track | |||
| Waypoint | Coordinat es | km | Directions and Remarks |
|---|---|---|---|
| D1 | N3.26.753 E101.59.813 | 0.0 | Trailhead |
| D2 | N3.24.804 E101.58.262 | 6.8 | River crossing (Sungai Dua Olak) |
| D3 | N3.23.999 E101.57. 297 | NA | Orang asli huts. Temporary or semi-permanent in nature, so don't be surprised if you don't see them. |
| D4 | N3.23.735 E101.57.1 25 | 10.4 | Top of the climb. Also the watershed between 2 river systems. |
| D5 | N3.23.310 E101.57.046 | NA | Rotten chassis of old 4wd. |
| D6 | N3.21.812 E101.57.5 3 6 | 15.0 | Log bridge crossing over Sungai Rogol. Look for trail continuation on the left after log crossing. Not obvious. |
| D7 | N3.20.776 E101.57.49 3 | 17.5 | River crossing (Sungai Kerau, which flows s outhwards). |
| D8 | N3.19.864 E101.57.4 7 3 | 19.4 | Trail ends at the bank of Sungai Kerau. Park bike here and trek upstream (south) to waterfall, about 50m away. |
| D9 | N3.19.796 E101.57.476 | NA | Kerau waterfall. Retrace your steps to return to starting point. |
Now, switch your GPS on. If your unit allows, set it to "gps off" or "demo mode" (eg on the newer Garmin eTrex units) or set it to "Simulator" (for the older units such as the Garmin GPS 12.)
Doing so will save your batteries as it shuts off the receiver circuitry.
Then, save each of the waypoints in

the table above into your GPS receiver. The simplest way to do this is:
- Go to the main menu and select "waypoint".
- Select New from the 'on page' menu.
- Enter the new name and the lat/long entry. (Specify WGS 84 for the datum, lat/long for the coordinate system.)
- Select an icon, if your unit allows.
- Select done when you are finished.
Do this for all the waypoints in the table. Once you are done, take a print-out of the trail directions and route table with you on your ride. As you ride on the trail, you will pass each waypoint that you have saved. Used in conjunction with the written directions, you should be able to find your way around the trail.
More advanced users can save each set of waypoints for a particular trail as a "Route" in the GPS receiver. To learn how to do this, RTFM.
Uploading Waypoints into your GPS receiver
You can also upload a waypoint file into your unit from your computer. I'll bet there are countless ways to do this, but I'll only describe the use of a GPS application called OziExplorer. Because that's the application I've used for the waypoint files found on this site and, more pertinently, that's the only way that I know how.What OziExplorer does is to allow me to download the data that I've acquired on my GPS to my computer, which I will then post onto the KLMBH website. Then you can download that data from this site and upload it into your GPS. Of course, it's also much more powerful than that; for example you can use OziExplorer to overlay the GPS data over a scanned map to generate your own trail map.
To use OziExplorer, you'll need, in addition to your GPS receiver:
- A non-obsolete PC with a free serial port. (Lots of RAM will be nice if you want to use scanned maps.)
- A cable connector that will allow you to link your GPS to that serial port. If you own an eTrex Venture/Vista/Legend, this should have been bundled together with your unit. If you don't have one, you can buy one from the supplier, or if you're an electronics whizz like Pat, you can make one for yourself and all your friends.
First, you need to install OziExplorer. A shareware, demo version of the application is downloadable from oziexplorer.com. The demo version has several functions dis-enabled, the most important of which is the ability to calibrate a scanned map using more than 2 points on the map.
You'll need to spend some time fiddling with the configuration settings, all of which are more than capably explained by the Help function in OziExplorer, so nothing will be gained by my repeating them here.
Now, download a waypoint file to your computer: try dua.zip. Uncompress this archive, which will contain two files: "dua.plt" and "dua.wpt". Then, all you need to do is go to the "Garmin" menu (or your brand of GPS) and select "Send Waypoints to GPS". Locate the .wpt file on your c: drive and you're off.
It's a bit of an effort to do all of the above just for the ability to automatically upload waypoints. Fortunately, OziExplorer is much more useful than just that, one of which is its ability to manage tracklogs.
Tracklogs
You'll notice that your GPS will map your route as you travel. These squiggly lines, called tracklogs, are stored as points in the memory of your GPS. The GPS receiver then uses some kind of software wizardry to join the dots on its display. But there's usually limited space for this data. On my very used Garmin GPS 12, there is space for 1024 points, while the newer eTrex units take 2048 points. (Woo hoo!)
 Because of the limited space, this data will be overwritten (if you've set the "track" setting to "wrap" in your unit) once you've used more than the alloted space. But using an application like OziExplorer, you can save this tracklog file on your computer for later use. When you want to return to the trail in question, you can upload it into your GPS receiver in much the same way that you uploaded waypoints. You can also upload a tracklog that someone else has recorded.
Go to the "Garmin" menu (or your brand of GPS) and select "Send Track to GPS". Locate the .plt file on your c: drive (which you have downloaded and uncompressed earlier) and that's it. The tracklog will now be displayed in your GPS.
Your GPS unit will also be recording its own tracklog. It's important that you now turn off the tracklog recording on your unit. This will avoid a confused jumble of lines appearing on the display and, more importantly, will prevent the uploaded tracklog from being overwritten. (Note that on the earlier, basic Garmin eTrex unit (the yellow one), you can't turn the tracklog setting off. On the newer eTrex units (Vista/Venture/Legend) you can turn it off but it will resume recording if you turn the unit off and on again.)
To turn off the tracklog recording on a Garmin GPS receiver:
- Go to the map page
- Select OPT or CFG (depending on model)
- Select "Track Setup"
- Select the "Record" field
- Select "Off"
You will now have a tracklog of the Sungai Dua trail displayed on the screen of your GPS. Your current position will be marked as a dot in the middle of the display. All you now need to do is to keep following the track. You should be able to tell fairly quickly (50-100 metres) if you've started to go off the correct trail, because the position marker will start to diverge from the marked track. Because you've turned the tracklog recording off, no other lines will be displayed on the screen, and the displayed tracklog will not be in danger of being overwritten.